
This was a casual game I played on VASSAL in mid-August 2019. This game was a very early experiment with a list I was tinkering with, so the strategies and openings are still in the building stage.
My list
Slow News Day... because it's Sloane+Nu's, get it? I think I saw someone mention in passing that the Autoblaster Xg-1 Gunboat might be something worth looking at, and I thought they might have been on to something. Gunboats are beefier than T-65 X-Wings and the SLAM is a pretty neat trick. I tinkered around with builds involving multiple AutoGunboats until I noticed that a Sloane Lambda actually fit nicely, and I've been a really big fan of Sloane since Second Edition launched. I briefly toyed with using Jendon here but once I realised that an otherwise naked Sloane OGP and 4 Xg-1 Gunboats with Advanced SLAM was exactly 200 points, I figured it was meant to be. My first test game with the list was a win involving some pretty skewed dice, so I wanted to keep testing.
Opponent's list
I want to like Resistance Chewbacca but the games I've played against him, I've found that he doesn't hit quite hard enough unless you stack upgrades on him, at which point he either dies too fast or can't fit enough friends to leverage his ability (or both). He still can't be underestimated, but between his size and his general struggle to get double mods, he's manageable. This list looked otherwise scary, though; Finn is notoriously annoying to kill, Bastian is a cheap (and underutilised, imho) piece that can deliver a nice coup de grâce, and Jess is versatile and pretty cost-effective as well. This list has the pieces to very quickly destroy a target while enduring a fair amount of incoming damage and punishing you when it doesn't.
Opening strategy
The big choice here in target priority is basically "to Chewie or not to Chewie". Generally, if I'm a list that favours quantity over quality when it comes to red dice, I'm inclined to just bite the bullet and take out the Wookiee first, and that applies here. I'll take shots of opportunity wherever I have to, and I'm not going to look gift 4-die Autoblaster horses in the mouth, but the general plan will be to take down Chewbacca first. After that, the board state will likely determine the order of things, but I'd prefer to take the T-70's first and leave Finn until last. This would be especially true in a tournament situation, where wasting many turns trying to get after Finn's meager 30 points just isn't practical barring a scenario where he's been caught dead to rights.
I'd prefer my opponent take first player so that I can SLAM in reaction to whatever his I2's do; we're both 200 points, but I win the roll and get my way.
I'd prefer my opponent take first player so that I can SLAM in reaction to whatever his I2's do; we're both 200 points, but I win the roll and get my way.
Deployment
I feel pretty strongly about bringing gas clouds with this list. Gas clouds are great for the Lambda, who can not only travel the whole board without fear of taking obstacle damage, but can hid behind them and actually avoid damage to boot. The real reason, however, is because of this:
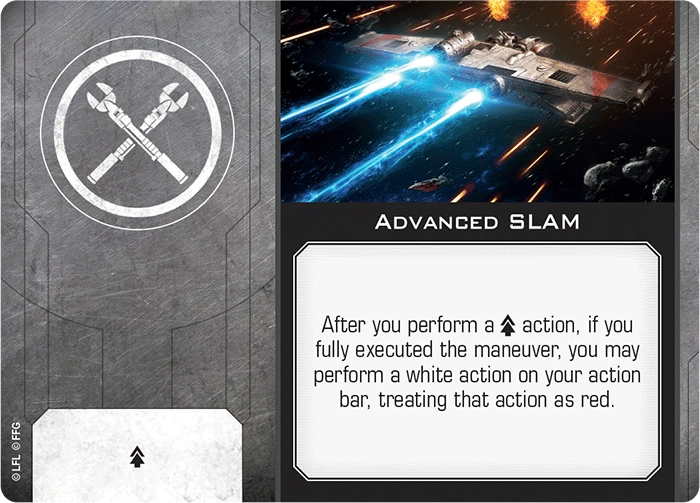
Being able to do a maneuver, then SLAM into or through a gas cloud and still take an action thanks to the wording of Advanced SLAM seems awfully appealing. This really helps to mitigate the clunky Gunboat maneuverability, as they can otherwise get caught in awkward positions as they try to SLAM around in lieu of a K-Turn. It also opens up new and interesting approach vectors. There's also the slim possibility that I autoblaster some unblockable crits through a gas cloud, ignoring the free evade token, but that sounds unlikely (although rage-inducing for my opponents if it happens!). Mostly, the clouds give an advantage that I expect few, if any, of my opponents will be able to leverage, and any time you can set up a one-sided situation like that, you probably should be doing it.
My opponent also brings gas clouds. Their list strikes me as a "small rock" list, but I'm not about to complain about getting six gas clouds!

My opponent corners the first cloud (1) while I place my first obstacle one range band away from his corner (2). Given the advantages I mentioned earlier, I want the gas clouds grouped up enough to leverage this without them being prohibitively tight, so setting one here is a good way to keep things loosely grouped.
My opponent places near the middle of the top board edge for his next choice (3), building a strong barrier along that board edge that will require ships to firmly commit to entering the middle of the board. I do something similar with my next cloud (4), setting it roughly range 3 from my opponent's board edge, but set inwards a little to avoid too many wide lanes for the Falcon to fly through, as well as supporting my goal of building a loose clump.
Finally, my opponent's last cloud (5) goes in the top left corner, confirming his goal of making a board edge lane with multiple points of no return. I stick with the plan for my last cloud (6), placing just outside of range 1 from my other two clouds to give me a loose clump of clouds that I can approach around or through.
The Lambda gets placed first. My general approach with this list so far has to take a fairly dispersed approach, since SLAM allows elements on either flank to react fairly quickly and arrive in time for an engagement at most board locations. As a result, I place the Lamba in a fairly central location with the intent of placing pairs of Gunboats in the vicinity of the two board edges.
My opponent sets both of his I2's along the bottom edge, avoiding the gauntlet he established at the top edge with his obstacle placement. My Gunboats scoff at gas clouds, so I put a pair of them in that lane; I don't plan on them staying there for long, but this at least should prevent my opponent from getting cheeky with his last two ship deployments and going for a flank. My other two ships end up about two thirds of the way down, where I can slow-roll them into the fight. Chewie and Jess both follow the I2's deployment, setting up for an opening based along the bottom edge. This favours my opponent a bit, as it means that after our opening engagement, I'll likely have to deal with obstacles while my opponent freely maneuvers in the open area. We'll be putting my Gunboats vs. Gas Clouds theory to the test!

Overall, this seems like an acceptable Turn Zero. His ships seem pretty committed to an engagement that I'm prepared for, and I have options to react if he does something unexpected.
Turn 1
Since I don't foresee him changing from his indicated plan of running across that bottom board edge, I feel safe in reacting accordingly. I want to get my Gunboats at the top of the board nice and far across the board now so that they'll be coming in on a flank or from behind when they engage, while everyone else needs to slow roll.


Activation
- Omicron Group Pilot: 2 Forward, Reinforce (fore)
Okay, I lied, that's not slow rolling. However, I'm visualising an engagement happening in the middle of the board with my pieces sort of enveloping the enemy squad, and to do that, I want to get OGP out in the middle. Worst case, I just keep barreling forward and take rear arc shots.
- Lieutenant Bastian: 2 Forward, no action
- Finn: 2 Forward, no action
No real surprises here.
- Nu Squadron Pilot 1: 3 Forward, SLAM (3 Forward), weapons disabled
- Nu Squadron Pilot 2: 3 Forward, SLAM (3 Forward), weapons disabled
- Nu Squadron Pilot 3: 1 Bank Left, Focus
- Nu Squadron Pilot 4: 1 Bank Left, Focus
I decide to bank instead of 1 straight just to give me a little bit more space. My intention is that the next turn I can do a hard 2 turn in and SLAM forward, and having the 45 degree angle will give me a decent chance at some bullseye arcs. Finally, it's a (very) half-hearted feint on my intentions with the Nu's; I don't think my opponent will misread them or make any bad calls, but I'm not giving up any real positional advantage to do it, so why not? Meanwhile, the Nu's at the top are nicely set to turn in next turn.
- Jessika Pava: 2 Forward, no action
- Chewbacca: 1 Forward, no action
Again, nothing crazy. Chewie hasn't turned yet which will limit his speed in getting to the engagement, for what it's worth.
No combat, so we're back to dials.

Turn 2
Time to turn in with my top Gunboats, I think. My list doesn't like engaging at R3, in that half the time it physically can't even shoot R3, so I do need to get my fellows at the top of the board turning in sooner than later. 2 forward followed by a hard 2 SLAM into the board will set them nicely, and I can decide next turn which way I want to go around the gas cloud in the middle of the board based on my opponent's moves this turn. Meanwhile, my Gunboats to the bottom will be doing a Hard 2 and then potentially SLAMming in if I can get some advantageous shots, possibly engaging before Chewie shows up. Since OGP actually can shoot at R3, now seems like a decent time to hit the brakes with him and set up to follow the Gunboats in.

Look closely at that shot for a second. Do you see the problem?
Activation
- OGP: Full Stop, Stress
- Finn: 2 Forward, Focus
- Bastian: 2 Forward, Focus
Opponent passes their opportunity to turn in behind those gas clouds and makes another advance, with no move towards the middle of the board yet.
And then I notice that I've set my dials backwards.
The thing is, sometimes this happens. At a larger event, there's no expectation that your opponent is going to take your word for it and let you fix the error, and so there's something to be said for practicing play from questionable and/or unexpected positions. Given that this was just a random casual game and that none of my maneuvers as dialed were putting a ship off the board, I decided to just go with it and see what I could salvage.
- Nu 1: 2 Hard Left, no action (gas cloud)
- Nu 2: 2 Hard Left, no action (gas cloud)
- Nu 3: 2 Forward, no action (bumps OGP)
- Nu 4: 2 Forward, SLAM (2 Hard Left), weapons disabled
Definitely not ideal.
- Jess: 2 Forward, no action
- Chewbacca: 2 Hard Right, no action
My chances of engaging before Chewie enters the fray are mostly gone because of my dial error, if they were there to begin with. Note that I do have a ship with Jam, so these early turns might have been used by Resistance player to grab locks on a gas cloud.
Still nobody shooting, so we're back to dials for round 3.

Turn 3
I've got to pick up the pieces a bit here. The only ship in the position I was hoping for is Nu 4, while the others are all in situations that are problematic for one reason or another. My original plan would have been to bank in with OGP here, but that's going to get in the way of Nu 3 now, so I need to stay out of the way of my I2's. Going straight with OGP at least leaves me with some reasonable options for the next turn, although this whole chain of events is going to cost me OGP actions (and therefore more incoming damage without being reinforced).
Nu 1 and 2 need to get nearby quickly, and 1 needs to also avoid running right from one gas cloud into the next, so I need to split their bearings. It's at least an all right opportunity to get Nu 1 to the right side of that clump of gas in the middle of the board and potentially come in behind the opponent's ships. It's very possible that Chewie goes into that same area this turn or next, and I want to keep pressure on him if he does.
Nu 4 was originally going to be part of a big gun line, but instead is now rushed out way ahead, so he's changing his role to flanker as well and making a break for the gas clouds. Like Nu 1, he'll be attacking from behind. Nu 3 needs to set up for next turn, but since he's bumping OGP right now, a hard turn should legally land since they're both still at 45 degree angles.
This is almost certainly the turn where my opponent banks in, so I expect some fire to be traded here, and I'm not really poised to be on the good end of a trade here, but it is what it is.

Activation
- OGP: 1 Forward (clear stress), Coordinate (Nu 4, Focus)
Coordinating is probably right but the precise action and target I chose could be debated. My thinking here is it saves me from Advanced SLAMming later, because I really don't like stressing the Gunboats if I don't have to.
- Finn: 2 Bank Right, Focus
- Bastian: 2 Bank Right, Focus
As expected, a cautious approach into the middle of the board, setting up for the range 3 engagement that I want to avoid.
- Nu 4: 2 Bank Left, SLAM (2 Hard Right), weapons disabled
- Nu 3: 2 Hard Right, no action (bumps OGP)
I swear that this isn't supposed to be a bump, based on ship dimensions and maneuver template geometry. It even looks clean up close:

It's an unexpected and mildly frustrating bump, but who am I to argue with VASSAL?
- Nu 1: 3 Bank Left, SLAM (3 Bank Right), weapons disabled, Advanced SLAM (Focus), Stress
- Nu 2: 3 Forward, no action (gas cloud)
I'm set up to hopefully get two shots this turn. Taking the stress on Nu 1 isn't ideal but I want the modded shots.
- Jess: 3 Bank Right, Barrel Roll Left Middle
- Chewbacca: 1 Bank Right, Lock (Nu 4)
Chewie does indeed set up to come in behind the gas clouds. Jess plays it safe and stays out of the fray for this turn.
Combat
- Chewbacca attacks Nu 4 (range 1), spends lock, 2 shield damage
- Nu 4 attacks Chewbacca (autoblasters, range 1, bullseye, but max 3 dice from Xg-1), 1 shield damage
- Nu 1 attacks Chewbacca (autoblasters, bullseye), 2 shield damage, 1 hull damage, Bastian acquires lock on Chewbacca
With the Nu's dodging most of the Resistance squad, I get off very lightly here and get some relatively cheap damage in on Chewbacca. In a perfect world, I would have had more guns in this engagement, but then again, that scenario would likely have resulted in more of the opponent ships shooting as well. As it stands, Chewie is already at a health total where he needs to be cautious, and his positioning is a bit problematic as well. All things considered, this isn't an awful situation.

Turn 4
My assumption this turn is an ongoing general advance (either 1 forward or some faster banks to the right) from my opponent, with Chewbacca either hard turning left to look for some open board space or heading to his right to get behind the gas clouds and Nu's 1 & 4. For my part, I just want to cover some board space with arcs and guarantee shots; if I can focus fire, even better, but because of my early missteps I suspect I'll be shooting targets of opportunity. I'm worried enough about Chewbacca trying to get to the right of those gas clouds that I'll send Nu 2 through the gas cloud in front of him to threaten that area of the board.
One of the bigger choices is with the Lambda, who can either hard turn in and face a lot of incoming damage or bank in, face less damage, and leave more options for the following turn. Either way, I stand to lose actions, but the latter choice lets me retreat through the clouds during the following turn(s), so I opt to go that way.

Activation
- OGP: 1 Bank Left, no action (gas cloud)
- Finn: 2 Bank Right, Focus
- Bastian: 3 Bank Right, Focus
For me, this is probably the more desirable of my opponent's main options, since I don't have to worry about getting denied shots due to range 3. OGP is going to take some fire, of course.
- Nu 3: 3 Hard Right, Focus
- Nu 4: 2 Hard Right, Lock (Finn)
- Nu 1: 2 Bank Right (clear stress) Focus
- Nu 2: 3 Bank Left, no action (gas cloud)
A few suboptimal choices here, I think. Nu 4 grabbing that lock felt safe at the time, but the moment I did it, I realised I was still in very clear danger from both Chewbacca and Jess, and Focus would have been preferable. Nu 1 perhaps should have gone a bit slower as well, in order to set up a better block on Chewie, but I wanted to keep my options open for a SLAM there; in hindsight, I don't think there were ever going to be any really tempting SLAMs, and leaving the option open was greedy. Finally, my move on Nu 2 threatens the area I was hoping to, but it's left him a bit more vulnerable than I'd like, and it's potentially very problematic for OGP's options next turn, something I probably should have considered more.
- Jess: 2 Hard Right, Focus
- Chewbacca: 3 Hard Right, Focus
As feared, both of these guns are now shooting at a weakened and token-less Nu 4. I'll be getting a lot of shots this turn, but so is my opponent.
Combat
- Chewbacca attacks Nu 4 (range 2), spends focus, 1 shield damage, 2 hull damage
- Jess attacks Nu 4 (range 1), spends charge, 2 hull damage, Nu 4 dies, Jess receives 2 stress from Admiral Sloane
My greedy decision to target lock costs Nu 4 his life (and his shot for the turn). If I'd focused, my chance at surviving would have been 76%, but without focus it's only 54%, and I lose the coin toss on this one. The double stress is at least nice, but I'm not sure I'm in a great position to fully capitalise on it.
- Finn attacks OGP (range 2), no damage
- Bastian attacks OGP (range 1), 2 shield damage
While Nu 4 didn't get too lucky, OGP dodges far more damage than he ought to. 2 shield damage is a bit short of the expected 3.8 damage he was facing here, but my opponent plays cautiously and conserves his focus tokens for defense, saving me from one damage.
- Nu 2 attacks Chewbacca (autoblasters, range 1, bullseye), 2 hull damage
- Nu 1 attacks Jess (autoblasters, range 2), rerolls with Sloane and spends focus, Jess spends BB charge to reroll, no damage
- Nu 3 attacks Finn (autoblatsters, range 1, bullseye), spends focus, Finn uses ability and gains strain, spends focus, 1 shield damage, clears strain
- OGP attacks Chewbacca (range 2), 1 hull damage and Wounded Pilot
The Nu 4 kill likely saves Jess or Finn from taking at least one more damage here.

Turn 5
Positionally, I think things are okay but not great. Chewbacca is not left with too many great options, especially with Wounded Pilot forcing him to either fix the crit, forego an action, or risk giving me Sloane re-rolls. I put him on trying to head towards the top right, but there's a possibility he tries to hard turn to the right and catch me off guard. Finally, he might S-Loop in either direction, but both leave him exposed, vulnerable to Sloane re-rolls, and potentially missing on his Chewie free action upon his death. I try to dial to cover as many of these bases as possible. I'd love to be aggressive and do a 2 bank with OGP here but I'm pretty certain it bumps (and checking after the fact, it indeed would have, although just barely), so I'll opt for a more certain bump with 1 forward and hope that OGP and Nu 2 can finish Chewie off.
I'd love to pile on Jess here, but even stressed, I'm not sure if I can get her with mroe than Nu 3. If Nu 1 banks in slow and she avoids that arc, I'll have no shots with Nu 1, so I decide to hedge and pursue targets I'm more confident of keeping in arc.
OGP is almost certainly going to be taking a lot of damage this turn, so I mostly just have to hope that the dice keep it alive for one last turn after this. There's a chance that both Finn and Bastian turn right, in which case I might bump one or both and save OGP some pain.

Activation
- OGP: 1 Forward, no action (bumps Nu 2)
- Finn: 2 Hard Right, Focus
- Bastian: 1 Bank Right, no action (bumps Finn)
Not sure what Bastian's plan was here, as he was bumping Finn even if OGP wasn't still there, and would have landed on the cloud if both Finn and OGP were out of the way. I can only assume the bump is intentional. He'll still get mods on his OGP attack if OGP takes a damage card before Bastian shoots, though.
- Nu 3: 1 Forward, no action (bumps Bastian)
- Nu 2: 3 Hard Left, Focus
- Nu 1: 2 Hard Right, Lock (Finn)
Nu 3's bump was unexpected and will deprive me of some mods on Jess, unfortunately. Nu 2 moves up to either block or chase Chewbacca, depending on his move. Nu 1 looks like he'll be out on Bastian; I'd thought there might be a SLAM here when setting dials, but my only hope at a shot is the unlikely possibility of Jess winding up in front of Nu 1. This time, I feel pretty safe about locking with Nu 1, but I'm really unsure of who to lock; I pick Finn but this is probably the worst of my possible choices, and almost certainly I should have chosen either of the T-70s, most likely Bastian.
- Jess: 2 Forward (clear 1 stress, 1 remaining), no action (bumps Nu 1)
- Chewbacca: 3 S-Loop Left, stress
I get the bump on Jess, which doesn't really accomplish a great deal aside from giving my single modded Nu 3 a bullseye, which is something, I suppose. Chewbacca's S-Loop is aggressive; he'll likely survive my attack (assuming he keeps the focus, Nu 2 has a 39% chance of getting four damage on Chewbacca here), but it's going to hurt a lot.
Combat
- Chewbacca attacks Nu 2 (range 1), no damage
- Jess attacks OGP (range 2), spends charge, 2 shield damage
- Bastian attacks OGP (range 1), no damage
- Finn attacks Nu 2 (range 2), no damage
Favourable dice really mitigate some damage here. OGP coming out with no damage cards and no target lock(s) from Bastian is unexpected, as is Nu 2 taking no damage at all. The Bastian miss is a really big swing in win probability and might even mean OGP lives to see not just next turn but the turn after that.
- Nu 2 attacks Chewbacca (autoblasters, range 1, bullseye), spends focus, 3 hull damage and Weapons Failure
- Nu 3 attacks Jess (autoblasters, range 1, bullseye), 3 shield damage
- OGP attacks Finn (range 1), no damage
Good outcomes for both attacks. Getting the kill on Chewbacca isn't out of the question (40% chance), and it would have been nice to get him while he was stressed, but taking 3 shields off Jess salves the wound a bit.

Turn 6
OGP's finally poised to get an action again! Otherwise, this turn is a bit tricky, and order of activation will be key. Nu 2 is easy: with Chewbacca blocking his more direct route back into the fight, I'll need to do two hard turns to the right and hope I have a shot on something. Since there's still a lot of action going on in the area where Nu 2 is sitting at the start of this turn, I want to point my guns in that area in general, so OGP will be banking in and I'll have Nu 3 bank and SLAM in from the bottom of the board. Finally, Nu 1 will do a hard turn to the right and hope my opponent doesn't get clever by bumping with Bastian. Depending on how the board looks by then, Nu 1 might also SLAM; the 2 speed maneuvers are nice with the Gunboat as they really do leave a lot of options open.

Activation
- OGP: 1 Bank Left, Reinforce (aft)
- Finn: 2 Bank Right, Focus
- Bastian: 2 Hard Right, Focus
I'm not quite sure what the plan is with Finn here, aside from gumming up a lane (which is a perfectly fine function for tanky, cheap Finn). Bastian is poised to deliver a killing blow on OGP, if at least one other ship gets arc on the Lambda. However, this is now looking to be a turn where I can get all ships firing once more.
- Nu 2: 2 Hard Right, SLAM (2 Hard Right), weapons disabled, Advanced SLAM (Focus), stress
- Nu 3: 3 Bank Left, Focus
- Nu 4: 2 Hard Right, Focus
Once Nu 3 landed, I realised that SLAMming would put me on the gas cloud in Finn's arc, and almost certainly without a shot back. Unfortunately, that means no SLAM and some awkward positioning for next turn.
- Jess: 1 Forward (clear stress), Focus
- Chewbacca: 1 Forward (clear stress), repair Weapons Failure, receives 1 stress from Wounded Pilot
Jess moves up and gives a strong indication that she will be using her BB Astromech's last charge next turn. Chewbacca lines himself up to give OGP a tailor-made kill shot.
Combat
- Chewbacca attacks Nu 2 (range 1), 1 shield damage
- Jess attacks OGP (range 2 obstructed), spends focus, gas cloud converts an evade, no damage
- Finn attacks Nu 2 (range 2), Finn adds focus result and gains 1 strain, spends focus, 1 shield damage
- Bastian attacks OGP (range 1), spends focus, OGP adds one evade (reinforce), 3 hull damage, Bastian acquires lock on OGP
Things go pretty much as well as could be hoped. Nu 2 surviving with shields intact is a nice bonus.
- Nu 2 attacks Finn (autoblasters, range 2), Finn uses ability to add blank, rerolls with Heroic, 1 hull damage and clears strain
- Nu 1 attacks Bastian (autoblasters, range 1, bullseye), spends focus, 2 shield damage
- OGP attacks Chewbacca (range 1), 3 hull damage and Disabled Power Regulator, Chewbacca dies, no bonus action (stressed), bonus attack
- Chewbacca attacks Nu 2 (range 1), no damage
A big turn for me. Chewbacca is off the board with no fallout from his ability and Finn is down to half as well as in an awkward position. OGP will almost certainly be gone next turn, though, so I need to keep the pressure and not let my opponent get back into the game.

Turn 7
I don't think there's a way to reliably save OGP here. The hard stop leaves me open to getting K-Turned on by Bastian and backdoored by Jess, not to mention blocking Nu 1 from anything meaningful, so I feel forced to get OGP out of the way and just hope for the best.
I'm not 100% on where exactly Bastian will be going, but the 1 bank from Nu 1 will definitely keep him in arc barring a reposition. Nu 3 will also be turning in, ideally to shoot Bastian as well. There's a chance this gets blocked by Finn (and subsequently punished by Jess, depending on which way she BB barrel rolls), but I'm willing to accept that risk. As far as Nu 2 goes, I see no way of both clearing his stress and putting him in a decent position to do damage this turn, so I'll just keep him stressed and turn him in to the same region of the board I've been generally pointing my guns at so far this game.

Activation
- OGP: 1 Bank Left, Reinforce (aft)
- Finn: 2 Hard Right, no action (gas cloud)
- Bastian: 1 Forward, Focus
As it happens, the hard stop would have indeed caught Bastian. I still don't know what I would have done with Nu 1, though. I suppose I could have turned Nu 1 around to pursue Finn, but as I mentioned in the preamble, I really hate to sink a lot of time and resources into Finn, especially since I already have 15 of his 30 points.
- Nu 1: 1 Bank Right, Focus
- Nu 2: 2 Hard Right, no action (stressed)
- Nu 3: 2 Hard Left, no action (bumps Finn)
Not quite where I'd hoped to end up with Nu 3, losing a shot and my chance to potentially kill Bastian.
- Jess: 3 Forward, no action (gas cloud, bumps Nu 1)
I think what happened here is that Nu 3's bump on Finn looked to have blocked Jess's barrel roll, and so Jess just plows through the gas instead. Good news for my gunboats, bad news for the shuttle.
Combat
- Jess attacks OGP (range 2), OGP adds one evade (reinforce), 2 hull damage
- Bastian attacks OGP (range 1), OGP adds one evade (reinforce), 3 hull damage and Blinded Pilot, OGP dies
- Nu 1 attacks Bastian (autoblasters, range 1, bullseye), Bastian spends focus, 1 shield damage, 1 hull damage, and Console Fire
- Nu 2 attacks Bastian (autoblasters, range 1, bullseye), 2 hull damage
OGP dies as expected; I wasn't quite holding out for that 14% chance of survival. On the other hand, I get reasonably lucky against Bastian, outperforming my 2.9 expected damage and putting him in a really terrible situation for next turn.

Turn 8
Despite the loss of Omicron Group Pilot, I feel pretty good about the board state now. Bastian is in a devil of a position, having to choose between regrouping and hoping for the best, or K-Turning/Tallon Rolling and praying that the Console Fire doesn't do him in. Finn needs to K-Turn to get back into the fight, so I feel comfortable in ignoring him for this turn. Finally, Jess is also in an awkward position. I vaguely anticipate she'll be heading somewhere towards where Bastian currently sits, but that last BB charge is still live, so I feel like I just have to get broad arc coverage once again.
My priority this turn is making absolutely sure that Bastian doesn't survive to see Turn 9, and my moves generally reflect that. Nu 1 will go 1 forward and hope Bastian doesn't get too far away, although even a 1-speed SLAM might be able to catch him if he does. Nu 2 needs to clear stress, and doing so with a 2 bank to the right both puts pressure on Bastian if he tries to bug out that way and potentially blocks Jess (or forces the BB charge) depending on her maneuver. Finally, Nu 3 no longer has enough room to hard turn in, so I'll need to go forward and SLAM in, which should also close off Bastian's other escape vector.

Activation
- Finn: 3 K-Turn, Stress
- Bastian: 4 K-Turn, Stress
Bastian chooses to play the Console Fire lottery, likely aware that he has few ways to survive this turn regardless and may as well get a shot before he goes.
- Nu 2: 2 Bank Right (clear stress), SLAM (2 Hard Left), weapons disabled
I call an audible when I land the 2 bank as I don't like my odds at blocking Jess and foresee taking a lot of free shots, so I slam to the left to set up a re-entry to the fight on the next turn. Not Advanced SLAMming here for a defensive focus is almost certainly a mistake, given that Bastian and potentially Jess could be shooting at me.
- Nu 1: 1 Forward, Focus
- Nu 3: 2 Forward, SLAM (2 Bank Left), weapons disabled, Advanced SLAM (Focus), stress
Nu 3 perhaps should have done a 2 Hard with his SLAM, but I was nervous about missing the arc on Bastian.
- Jess: Spends 1 BB Astromech charge (0 remaining), Barrel Roll Left Backward, 1 Bank Right, Focus
The last BB charge is spent, and it will probably get Jess an awfully big chunk of Nu 1's health pool.
Combat
- Jess attacks Nu 1 (range 1), spends focus, 3 shield damage, 1 hull damage, Bastian acquires a lock on Nu 1
- Bastian takes no Console Fire damage and attacks Nu 1 (range 2), spends lock, 2 hull damage, Bastian acquires a lock on Nu 1
- Finn attacks Nu 1 (range 3), no damage
Nu 1 gets absolutely shellacked. Jess getting into Nu 1's hull to feed Bastian the TL is a sub 5% likely event, and Nu 1 suffering 6 damage in that whole exchange is lower still. I've benefited from some timely variance a few times previously in this game, but here the dice gods rain their wrath upon me and leave Nu 1 gasping.
- Nu 3 attacks Bastian (autoblasters, range 1), spends focus, 1 hull damage, Bastian dies
Bastian pays for his crimes against the Empire, but the damage is done. Instead of cruising into a very favourable endgame, I'll have to remain pretty cautious to make sure Jess doesn't start mowing down gunboats.

Turn 9
After witnessing my opponent's display of brutality, I get a little gun shy on this turn. Keeping Nu 1 alive is my first priority, so to do that I'll run him toward the bottom of the board and hope to harass Finn with him, since Finn seems likely to head back toward the middle of that gas cloud clump. If Jess calls this and chases, I'll be amazed.
Nu 2's positioning is awkward, and trying to regroup by heading down through the middle of the board feels more predictable and less favourable for future turns, whereas regrouping toward the top of the board and swing around the top right gas cloud means Nu 2 will have a different attack path for future turns. Finally, Nu 3 needs to clear stress and then try to threaten Jess. I'm not 100% on what Jess does; my best guess is that my opponent thinks I'll predict a Jess K-Turn and will go 1 Forward to try to catch me doing the same.

Activation
- Finn: 1 Bank Left (clear stress), Focus
- Nu 2: 2 Hard Right, SLAM (2 Hard Right), weapons disabled, Advanced SLAM (Lock Jess), stress
- Nu 3: 2 Bank Left (clear stress), SLAM (2 Hard Left), weapons disabled, Advanced SLAM (Focus), stress
- Nu 1: 3 Hard Right, SLAM (3 Hard Right), weapons disabled, Advanced SLAM (Focus), stress
- Jess: 1 Forward, Boost Right
I get some good reads and am rewarded with a relatively nice board position. Jess slips out of Nu 3's arc, but at least none of my ships will be dying before I'm ready for them to go.
Combat
- Nu 1 attacks Finn (autoblasters, range 1, bullseye, but max 3 dice due to Xg-1 config), spends lock and focus, Finn adds focus result and takes 1 strain, spends focus, no damage
Have I mentioned yet how aggravating and fruitless trying to take Finn down can be?

Turn 10
The quest to keep Nu 1 safe continues. All three of my gunboats need to clear stress, but hopefully I can get shots with at least two of them. Nu 2 will bank right to threaten Jess, Nu 3 will bank left to threaten Finn, and Nu 1 will bank right and then consider a follow-up action based on wherever Finn is.

Activation
- Finn: 1 Bank Right, Focus
- Nu 1: 2 Bank Right (clear stress), SLAM (2 Hard Right), weapons disabled, Advanced SLAM, Lock Finn, stress
Not sure if the SLAM was really necessary there, but my position is pretty safe and reasonably well set for next turn.
- Nu 3: 2 Bank Left, Focus
- Nu 2: 2 Bank Right, SLAM (2 Bank Right), weapons disabled
Another mistake, Nu 2 should have Advanced SLAM for the focus. I was thinking that it wouldn't be that useful offensively, but defense was what I should have been thinking about.
- Jess: 4 K-Turn, stress
A somewhat risky maneuver from Jess, but not one I'm punishing this turn. Her next turn becomes much more predictable, though.
Combat
- Jess attacks Nu 2 (range 3), 1 shield damage
- Finn attacks Nu 3 (range 1), 2 shield damage
Nu 2 is punished for not taking the focus, while Nu 3 coughs up some shields. Unfortunate but not catastrophic.
- Nu 3 attacks Finn (autoblasters, range 1), Finn adds focus result and takes 1 strain, spends focus, no damage, clears strain
Seriously, have I mentioned that Finn is a huge pain?

Turn 11
Other than perhaps Nu 3, this is actually a pretty decent looking board for me. Jess has limited options given her stress, while Finn's options are narrow due to the Transport Pod's dial. Nu 1 and 2 will dial fairly conservatively to just try to kill whatever shows up in front of them (and hope that Jess doesn't initiative-kill Nu 1). Nu 3 doesn't have great options, but a couple of hard turns might be able to catch Jess with a block.

Activation
- Finn: 3 K-Turn, stress
This was very unexpected. It's an extremely aggressive play to get Nu 1 but leaves Finn terribly exposed.
- Nu 2: 1 Forward, Focus
- Nu 3: 2 Hard Left, no action (gas cloud)
- Nu 1: 2 Bank Right, Focus
Didn't quite eyeball Nu 3 well there, and end up on a gas cloud instead of SLAMming.
- Jess: 1 Forward (clear stress), Boost Forward
Another surprising choice. The boost dodges Nu 3's unmodded arc and guarantees a Jess reroll, but it fails to get range one on Nu 1, gives a double-modded 4 die shot on Jess to Nu 2, and leaves Jess without a token.
Combat
- Jess attacks Nu 1 (range 2), spends charge to reroll, no damage
Nu 1 dying here was a bit of a coin flip (57% chance of taking 1+ damage), but the gunboat surviving with focus token intact is a disastrous outcome for my opponent.
- Finn attacks Nu 1 (range 1), no damage
Now my opponent is in real trouble. He had a 77% chance to kill Nu 1 here but it didn't happen, which will make his future turns that much more aggravating.
- Nu 2 attacks Jess (autoblasters, range 1, bullseye), spends focus, 4 hull damage including one crit (not revealed), Jess dies
- Nu 1 attacks Finn (autoblasters, range 1, bullseye), spends lock and focus, 4 hull damage, Finn dies
Or maybe there won't be any future turns to worry about. The Empire wins, 200-108.

Closing Thoughts and Lessons Learned
This might seem like a weird game to showcase, given the dial blunder at the start, but I do think that there's value to playing from an unexpected or disadvantaged position and trying to find ways to make it work. As it happened, the dial snafu made my opening engagement much more awkward, but I was able to make it work reasonably well.
Action decisions were an issue in this one a couple of times, at least. The early target lock that lead to my gunboat casualty is the most obvious example, but a few other times I either made questionable lock decisions or chose not to Advanced SLAM when I should have (or vice versa). The decision on when to stress the gunboat is a tricky one, thanks to their lack of blue 1-banks. Certainly it's a ship that needs consideration of at least the next turn.
Finn is obnoxious and I definitely still maintain that if you can ignore him, do it. His survivability is high but he's not a huge damage dealer, his dial leaves him somewhat predictable, and killing him doesn't result in a big scoring advantage.
Another issue this game was my OGP play. Palp shuttles are easy since you're still getting value from them even if you just play super safe in a distant corner. Sloane shuttles need to be at least reasonably close to the action, which means a bit more of a tight rope act. I think I was a bit too reckless with my Lambda this game and tried to get a bit too cute, where coming in slower from the start might have been better overall.
Finally, I think I caught a break at the end with my opponent getting a bit aggressive. I'm still reasonably comfortable with the endgame situation the board was heading to, but this really brought the game to a quick end, where I think it might have been in my opponent's interest to drag it out and keep trying to win by attrition (or at least claw some more points out of my weakened gunboats).
Finally, I think I caught a break at the end with my opponent getting a bit aggressive. I'm still reasonably comfortable with the endgame situation the board was heading to, but this really brought the game to a quick end, where I think it might have been in my opponent's interest to drag it out and keep trying to win by attrition (or at least claw some more points out of my weakened gunboats).
Anyway, thanks for reading, please feel free to comment below with your observations and thoughts!


No comments:
Post a Comment